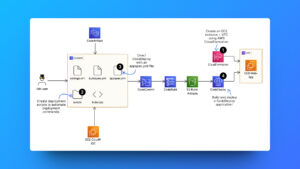
In this guide, we’ve walked through the process of deploying a web application on AWS using CodeDeploy. By leveraging services like S3, EC2, and IAM, we’ve configured a robust deployment pipeline that allows us to automate the deployment of our web application.
From setting up a CodeDeploy application to creating a deployment group and finally deploying our application, this step-by-step guide ensures a smooth and efficient process.
Set up IAM User
Follow this step below because you will need a new IAM user to complete this project
- Open the console and select IAM from the left-hand navigation panel.
- Choose Add User and enter the desired User name. Select the checkbox for AWS Management Console access.
- Set a secure console password and deselect Require password reset
- On the permissions setup page, select Attach existing policies directly and choose the relevant policies. Confirm by clicking Next.
- Copy the console sign-in URL and log out of the root account. Use the IAM user’s credentials from the downloaded .csv file to log in.
Create Your Cloud9 Environment
Setting Up Your Web App Development Environment
Create a Cloud9 Environment
- Open the AWS Management Console.
- Ensure you are using the closest AWS Region.
- Navigate to Cloud9.
- Click Create Environment.
- Name: NextWorkIDE
- Environment type: Create a new EC2 instance for the environment
- Instance type: t2.micro
- Platform: Amazon Linux 2
- Click Next Step and then Create Environment.

Install Maven and Java
Once the Cloud9 IDE loads, open the terminal.
Install Apache Maven
sudo wget https://repos.fedorapeople.org/repos/dchen/apache-maven/epel-apache-maven.repo -O /etc/yum.repos.d/epel-apache-maven.repo
sudo sed -i s/\$releasever/6/g /etc/yum.repos.d/epel-apache-maven.repo
sudo yum install -y apache-maven
Install Amazon Corretto 8 (Java 8)
sudo amazon-linux-extras enable corretto8
export JAVA_HOME=/usr/lib/jvm/java-1.8.0-amazon-corretto.x86_64
export PATH=$JAVA_HOME/bin:$PATH
Verify Java and Maven installation
java
mvn -version
Create Your Web Application
Use Maven to generate a Java web app
mvn archetype:generate \
   -DgroupId=com.nextwork.app \
   -DartifactId=nextwork-web-project \
   -DarchetypeArtifactId=maven-archetype-webapp \
   -DinteractiveMode=false
Notice the set upof the folder nextwork-web-project in your cloud9 environment.
- Locate and Open src/main/webapp/index.jsp in the file explorer.
- Add the below HTML to it.
<html>
<body>
<h2>HELLO! THIS IS 'YOUR NAME'</h2>
<P>I'm a software engineer and devops engineer, my spacailty is on AWS services.</p>
<button>Message Me</button>
<p>Follow me on LinkedIn at <a href="https://linkedin.com/in/anorue-wilson">LinkedIn Page</a></p>
</body>
</html>- Replace <YOUR NAME> with your name in the HTML code, modify other details as you which.
- Save your changes.

Create an AWS CodeCommit Repository
- Search for CodeCommit in the AWS Management Console.
- Click Create Repository.
- Name it NextWork-Web-Project
- Add a description and click Create.
Commit and Push Your Code
- In Cloud9, set up your Git identity
git config --global user.name "your name"
git config --global user.email "your email"
Navigate to your project directory and initialize Git
cd nextwork-web-project
git init
Copy the HTTPS URL from your CodeCommit repository and set it as the remote origin
git remote add origin <Your CodeCommit HTTPS URL>Commit and push your code
git add .
git commit -m "Initial commit."
git push -u origin main
When you commit your code, you will be required to enter your username and password, you should put GitHub username and password. Recently GitHub doesn’t allow signing in remotely with a username and password so you would have to create an access key or passkey.
Follow this page to create a passkey and use your access key in place of your password, it works that way.
Congratulations! You’ve set up your development environment, created a Java web app, and pushed your code to AWS CodeCommit.
Setting Up CodeArtifact Domain and Repository
Create a CodeArtifact Domain
- Search for the CodeArtifact service in the AWS Management Console.
- Click Domains in the left-hand menu, then Create Domain.
- Name your domain, for example, Nextwork-domain.
- Click Create domain.
Create a CodeArtifact Repository
- After creating the domain, click Create Repository within your new domain.
- Name the repository, e.g., network-repo.
- Add a description, like a Repository for storing project dependencies.
- Select npm-public as the public upstream repository.
- Click Create Repository to finish the process.
Connect the CodeArtifact Repository
- On the next page, click View connection instructions.
- Choose npm for the package manager.
- Copy the command provided in Step 3 of the instructions.
- Open your Cloud9 terminal and run the command.
- To update the settings.xml file, first create it.
cd ~/environment/nextwork-web-project
echo $'<settings>\n</settings>' > settings.xml- Open the settings.xml file in Cloud9.
- Follow Steps 4, 5, and 6 in the CodeArtifact console, copying the code snippets and pasting them within the <settings> tags.
- Save your changes to settings.xml.
After modifying my settings.xml, my file looks like this.
<settings>
    <servers>
      <server>
        <id>nextwork-nextwork-packages</id>
        <username>aws</username>
        <password>${env.CODEARTIFACT_AUTH_TOKEN}</password>
      </server>
    </servers>

    <profiles>
      <profile>
        <id>nextwork-nextwork-packages</id>
        <activation>
          <activeByDefault>true</activeByDefault>
        </activation>
        <repositories>
          <repository>
            <id>nextwork-nextwork-packages</id>
            <url>https://nextwork-339713137304.d.codeartifact.eu-west-2.amazonaws.com/maven/nextwork-packages/</url>
          </repository>
        </repositories>
      </profile>
    </profiles>

    <mirrors>
      <mirror>
        <id>nextwork-nextwork-packages</id>
        <name>nextwork-nextwork-packages</name>
        <url>https://nextwork-339713137304.d.codeartifact.eu-west-2.amazonaws.com/maven/nextwork-packages/</url>
        <mirrorOf>*</mirrorOf>
      </mirror>
    </mirrors>
</settings>
Test Your CodeArtifact Connection
- Compile your application to ensure the CodeArtifact connection is working
mvn clean install- Go back to the CodeArtifact console and select your repository to confirm the connection.
Set Up an IAM Policy for CodeArtifact
- In the AWS Console, search for IAM and open it in a new tab.
- Click Policies in the left-hand navigation panel, then Create Policy.
- Select the JSON tab and paste the following code.
{
        "Version": "2012-10-17",
        "Statement": [
          {
            "Effect": "Allow",
            "Action": [
              "codeartifact:GetAuthorizationToken",
              "codeartifact:GetRepositoryEndpoint",
              "codeartifact:ReadFromRepository"
            ],
            "Resource": "*"
          },
          {
            "Effect": "Allow",
            "Action": "sts:GetServiceBearerToken",
            "Resource": "*",
            "Condition": {
              "StringEquals": {
                "sts:AWSServiceName": "codeartifact.amazonaws.com"
              }
            }
          }
        ]
}- Name the policy, e.g., CodeArtifact-Access.
- Add a description like Allows services to access CodeArtifact repository.
- Click Create Policy to finish.
Create an s3 bucket
- Search for S3 in your AWS Management Console.
- Click Create bucket.
- Name the bucket with a unique name, e.g., my-build-artifacts.
- Leave all other options as default.
- Click Create bucket
Create your Codebuild
Step-by-Step Guide: Create a CodeBuild Build Project
- Log into the AWS Console and search for CodeBuild
- Select Create build project.
- Name the project (e.g., MyWebAppBuild).
- Expand the Tags toggle beneath the Name field.
- Add a tag with Key: Project and Value: WebAppBuild.
- In the Source panel, select CodeCommit as the source provider.
- Choose your repository and branch.
Under the Environment panel, configure the following settings;
- Provisioning model: AWS-managed image
- Environment image: Ubuntu
- Compute: Build General1 Small
- Operating System: Ubuntu
- Runtime: Standard
- Image: aws/codebuild/standard:5.0
- Service role: Create a new role
- Under batch configuration, select it, and create a name for the batch role, you might need to disable it later on in the build process.

- In the Buildspec panel, select Insert build commands.
- Under Artifacts, set Type to S3.
- Choose your S3 bucket created earlier.
- Set the Artifact name (e.g., webapp-build).
- Change Artifacts packaging to ZIP.
- Enable CloudWatch logs in the Logs panel.
- Set CloudWatch group name and Stream name prefix.
- Click Create build project to finish!
Step-by-Step Guide: Create Your Web App’s buildspec.yml File
- Open Cloud9 IDE and locate the left-hand navigation panel.
- Right-click on the nextwork-web-project folder and select New File.
- Name the file exactly buildspec.yml.
- Copy the following content into the file
version: 0.2
phases:
  install:
    runtime-versions:
      java: corretto8
  pre_build:
    commands:
      - echo Initializing environment
      - export CODEARTIFACT_AUTH_TOKEN=`aws codeartifact get-authorization-token --domain nextwork --domain-owner 123456789012 --query authorizationToken --output text`
  build:
    commands:
      - echo Build started on `date`
      - mvn -s settings.xml compile
  post_build:
    commands:
      - echo Build completed on `date`
      - mvn -s settings.xml package
artifacts:
  files:
    - target/nextwork-web-project.war
discard-paths: no- Replace the placeholders
Update nextwork with the actual domain name of your CodeArtifact repository.
Replace 123456789012 with your AWS Account ID. To find your Account ID, go to your CodeBuild console, and click on your account name in the top right corner.

- Save the file by pressing Command + S (Mac) or Ctrl + S (Windows)
- Commit and push changes to CodeCommit by running the following commands in your Cloud9 terminal:
cd ~/environment/nextwork-web-project
git add .
git commit -m "Adding buildspec.yml file"
git push -u origin main
Modify Your CodeBuild IAM Role
- In the AWS Console, open the IAM console in a new tab.
- Select Roles from the left-hand navigation menu.
- Search for **`codebuild-nextwork-web-project-service-role`** and click on it.
- Click the Attach Policies button.
- Search for CodeArtifact.
- Select the codeartifact-nextwork-consumer-policy policy and click Attach policy.
With these steps completed, your `buildspec.yml` file is set up, and your CodeBuild role has the necessary permissions to interact with CodeArtifact during the build process.
Step-by-Step Guide: Testing the Build Project
- Go to the CodeBuild console.
- Select the nextwork-web-project and click Start build.
- Monitor the logs to track the progress. The build should be completed in about 5 minutes.
- Once complete, open the S3 console in a new tab.
- Navigate to your nextwork-artifacts S3 bucket.
- Verify that the packaged WAR file inside a zip named nextwork-web-project.zip is present.

Troubleshooting the build process:
- Go to your build dashboard, select edit, and unselect the batch configuration as it might be affecting your build.
- Confirm the file buildspec.yml is correct
- Find the errors at your specific build dashboard, locate the specific build there you can see the build logs files, also you find the build logs on cloudwatch logs.
🎉 Great job! You’ve successfully compiled your application using AWS CodeBuild.
Step-by-Step Guide: Modifying Your CodeBuild IAM Role
- Open the AWS Console and go to the IAM console in a new tab.
- In the left-hand navigation menu, select Roles.
- Search for the auto-generated role used by CodeBuild (usually named codebuild-<your-project-name>-service-role).
- Click on the role to open its details.
- Click the Add Permissions button.
- Select Attach policies from the drop-down menu.
- Search for the policy named CodeArtifactReadOnly, select it, and click Attach policy.
This updates the IAM role to grant permissions needed for CodeArtifact access during your build process.
Set Up your Deployment Environment
Set up your EC2 instance
Step-by-Step Process for Provisioning VPC and EC2 Instance with CloudFormation
Download the file from the GitHub link below
- Search for CloudFormation in your AWS Console.
- Click on the stack’s name, which should start with VPC-EC2-Stack.
- From the popup panel, select the Resources tab
- Locate the EC2 Instance and Instance Security Group in this stack.
- In the CloudFormation Console, click on Actions in the top right corner.
- Select Update Stack.
- Select Replace current template.
- Select Upload a template file.
- Click Choose file and upload the file named cloudformation-tmp.yaml.
- Name the stack VPC-EC2-Deployment.
- Under Parameters, provide your IP address for the MyIP field. Find your IP address by heading to [http://checkip.amazonaws.com/](http://checkip.amazonaws.com/).
- Copy your IP address and paste it into the MyIP field. Add /32 to the end.
- Download the provided file named configuration.json.
- Select the file you downloaded to use it as needed.

Step-by-Step Process for Creating Scripts
- Head back to your Cloud9 IDE.
- In the left-hand file explorer, right-click on network-web-project and select New Folder.
- Name your folder scripts.
- Right-click on the scripts folder and select New File.
- Name the file install_dependencies.sh.
- Add the following lines to install_dependencies.sh:
#!/bin/bash
sudo yum install tomcat -y
sudo yum -y install httpd
sudo cat << EOF > /etc/httpd/conf.d/tomcat_manager.conf
<VirtualHost *:80>
  ServerAdmin root@localhost
  ServerName app.nextwork.com
  DefaultType text/html
  ProxyRequests off
  ProxyPreserveHost On
  ProxyPass / http://localhost:8080/nextwork-web-project/
  ProxyPassReverse / http://localhost:8080/nextwork-web-project/
</VirtualHost>
EOF
Create start_server.sh Script:
- In Cloud9 IDE, right-click on the scripts folder.
- Select New File and name it start_server.sh.
Add the following lines to start_server.sh:
#!/bin/bash
sudo systemctl start tomcat.service
sudo systemctl enable tomcat.service
sudo systemctl start httpd.service
sudo systemctl enable httpd.service
Create stop_server.sh Script:
- In the scripts folder, right-click and select New File.
- Name the file stop_server.sh.
- Add the following lines to stop_server.sh:
#!/bin/bash
isExistApp="$(pgrep httpd)"
if [[ -n $isExistApp ]]; then
sudo systemctl stop httpd.service
fi
isExistApp="$(pgrep tomcat)"
if [[ -n $isExistApp ]]; then
sudo systemctl stop tomcat.service
fi
Confirm Scripts Folder:
- Ensure the scripts folder contains the following files:
– install_dependencies.sh
– start_server.sh
– stop_server.sh
- Create appspec.yml File:
- Right-click on the nextwork-web-project folder.
- Select New File and name it appspec.yml.
- Add the following content to appspec.yml:
version: 0.0
     os: linux
     files:
       - source: /target/nextwork-web-project.war
         destination: /usr/share/tomcat/webapps/
     hooks:
       BeforeInstall:
         - location: scripts/install_dependencies.sh
           timeout: 300
           runas: root
       ApplicationStart:
         - location: scripts/start_server.sh
           timeout: 300
           runas: root
       ApplicationStop:
         - location: scripts/stop_server.sh
           timeout: 300
runas: root- Modify buildspec.yml:
- Double-click on buildspec.yml in your Cloud9 left-hand navigation bar.
- Locate the following lines under the artifacts section:
artifacts:
files:
 - target/nextwork-web-project.war
discard-paths: no
You will add the following two lines under – target/network-we-project.war to make the buildspec file look like it is below;
artifacts:
files:
 - target/nextwork-web-project.war
 - appspec.yml
 - scripts/**/*
discard-paths: no
Commit Changes to CodeCommit
- In your Cloud9 terminal, run the following commands:
cd ~/environment/nextwork-web-project
git add .
git commit -m "Adding CodeDeploy files"
git push -u origin main
Start to Build in CodeBuild
- Log into the CodeBuild Console.
- Click on Start build.
This will create the necessary script file in your project folder.
Create the CodeDeploy service IAM Role
Log into AWS Console:
- Open your web browser and go to the AWS Management Console.
- Log in with your credentials.
Open IAM Console:
- In the AWS Console, search for IAM and select it to open the IAM console.
Choose Roles:
- In the left-hand navigation pane, click on Roles.
Create a New Role:
- Click on the Create role button.
Choose CodeDeploy as the Service:
- In the Select trusted entity section, choose AWS service.
- Under Use case, select CodeDeploy as the service that will use this role.
Select CodeDeploy for the Use Case:
- In the Select your use case section, choose CodeDeploy.
Proceed to Permissions:
- Click Next to proceed to the permissions step.
Review Permissions:
- Notice that the AWSCodeDeployRole policy is automatically suggested.
- Click the plus button (+) to review the actions allowed by this policy.
Name the Role:
- After reviewing, click Next.
- Name the role NextWorkCodeDeployRole.
Create the Role:
- Click Create role to finalize and create the role.
Create a CodeDeploy application
Access the CodeDeploy Console:
- Log into the AWS Management Console.
- Search for CodeDeploy and open the CodeDeploy console.
Create a New Application:
- In the left-hand menu, click on Applications.
- Click Create application.
Name and Select Platform:
- Name your application nextwork-web-deploy.
- Under the Compute platform, select EC2/On-premises.
- Click Create application.

Create a Deployment Group:
- After creating the application, click into your new nextwork-web-deploy application.
- Go to the Deployment Groups tab.
- Click Create Deployment Group.

Configure Deployment Group Settings:
- Name: Enter nextwork-web-deploy-group.
- Service role: Enter the ARN for the service role you created earlier: arn:aws:iam::<your-aws-account-id>:role/NextWorkCodeDeployRole.
- Deployment type: Select In-place.
- Environment configuration: Choose Amazon EC2 instances.
Configure Tag Group:
– Key: Enter role.
– Value: Enter webserver.
Install AWS CodeDeploy Agent:
- Select Now and schedule updates (14 days) for the AWS CodeDeploy Agent installation.
Deployment Settings:
- Choose CodeDeployDefault.AllAtOnce under Deployment settings.
Load Balancer Settings:
- Load balancer: Uncheck Enable load balancing.
Finalize Deployment Group:
- Click Create deployment group to finish the setup.
Create a Deployment:
- Go to your newly created nextwork-web-deploy application in the CodeDeploy console.
- Click Create deployment.
Specify Revision Location:
- Open the S3 console in a new tab.
- Navigate to your S3 bucket where the deployment files are stored.
- Click on your zip file, and copy the S3 URI.
- Paste the S3 URI into the Revision location field in CodeDeploy.
Set Revision File Type:
- Ensure .zip is selected as the Revision file type.
- Leave the other settings as default.
Initiate Deployment:
- Click Create Deployment to start the process.

Verify Deployment:
- Wait approximately 30 seconds for the deployment to complete.
- Go to the EC2 console.
- Select your WebServer EC2 instance.
- Click on the Open address link to access your web app.
- If the link defaults to https://, manually change it to http://.
Your web app should now be visible in a new tab.

Troubleshooting deployment:
- Ensure you have clicked on build on your last modifications on the cloud9 files otherwise, your build will not work because it can’t find any files to use in deployment.
- Ensure your deployment file is okay, check and check again
- Ensure resources are set up correctly in Cloudformation.
- If you still can’t access the websites then there might be one of two reasons or both reasons; your IP has changed so you might need to modify your security group to accept HTTP from your new IP or from all IP, other is HTTPD or TomCat is not running or setup properly, you might need to SSH into your server to debug or rectify the issue, you will also need to modify the Security Group. Ways to SSH to EC2 server
- You can try checking out your files or rather using my files from GitHub to test the deployment has it is correct.
Delete All Resources
- To avoid unnecessary charges, return to the AWS Console.
- Identify and delete all resources created, including:
EC2 Instances for your application and cloud9 editor
Security Groups
CodeDeploy Application and Deployment Group
S3 Buckets
IAM Roles
CloudFormation Stacks

Check out the application repository, in case you missed anything you can download the entire code from the repo below including the cloudformation stacks.
https://github.com/willie191998/project-cloud9-codedeploy-cloudformation
Check out a more detailed step of the project on the link below
https://learn.nextwork.org/projects/aws-devops-codedeploy?track=high
Conclusion
Congratulations on successfully deploying your web application using AWS CodeDeploy! By following this guide, you’ve gained hands-on experience with AWS services, setting up a deployment pipeline, and managing resources effectively.
Remember to delete all the resources you’ve created to avoid any unwanted charges. This process not only streamlines your deployment workflow but also prepares you for future projects with similar requirements. Keep experimenting and refining your skills to make the most out of AWS’s powerful cloud offerings!

