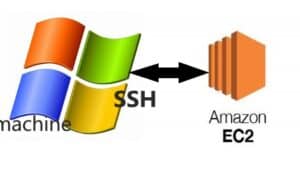
The primary way of connecting to your cloud-hosted instance (AWS EC2) is through SSH (Secure Shell) because you are connecting and managing your instance from a remote machine in this case your Windows machine, you need the connection to be secure.
SSH, or Secure Shell, is a widely used network protocol that provides a secure way to access and manage remote servers and devices over an unsecured network.
It offers encrypted communication between the client and the server, ensuring confidentiality and integrity of data transferred over the network.
SSH is commonly used for remote command-line login, remote command execution, and secure file transfer. It has become an essential tool for system administrators, developers, and network engineers for securely accessing and managing remote systems.
It is not very common to connect to an EC2 instance from a Windows machine because Windows does not come with an SSH tool installed nor is there an easy way to download SSH on your Windows machine.
This method I will show you is what I recently discovered, how to easily get SSH on a Windows machine.
It’s from GIT, Git is a distributed version control system for tracking changes in source code during software development that can be easily installed on your Windows machine, it comes with an SSH tool but most of us don’t know this because it is disabled on our command line most of the times during installation of Git.
Prerequisite
- Have an active AWS account with billing enabled.
- Have a running EC2 instance to connect to else check Setup EC2 instance easily.
- Have downloaded and can access your EC2 instance primarykey file for connecting to your instance (usually a .pem file).
I will show you how to install Git SSH tool below, follow the process and connect to your instance.
- Download Git for Windows 64 bit from the official website Windows 64-bits Git download. If you have already downloaded or installed Git before now, just find the installation package file and start the installation process again following this guide, you don’t have to uninstall Git.
- Install the Git package file by double-clicking on the downloaded package file. Click on YES if it asks you to allow administrative privileges to Git.

- Select NEXT to continue the setup process, continue to select NEXT but check out the screen before clicking NEXT until you see the screen with the details below.

- Select allow Git installation with other Unix tools and click NEXT. That is the only setup option where you have to make changes, continue to select NEXT till the setup is completed and installation is completed.
- Open your command line, click the Windows button, type cmd, and select the first option from the list.
- Type Git to ensure the Git is installed, you see the options for Git command as shown in the screenshot below.

- Type ssh in your command line, you will see the options to use the ssh command with as shown in the screenshot below.

- To connect to your AWS EC2 instance through SSH, use the connection string
ssh -i /path/to/private-key root@<ec2-public-dns-address>
This string is generic so you need to change some of the placeholders to the actual details of your ec2 instance.
– Replace the /path/to/private-key with the actual path folder of your private key file, the one you downloaded while creating your instance private key. Usually a .pem file
– Replace root to Bitnami, I am using a WordPress instance else it’s usually ec2-user for other instance types. Check out the list of AWS EC2 instance usernames.
– Replace the <ec2-public-dns-address> to your instance public IPv4 connection string usually in the form ec2-ipv4-adress.region-zone.compute.amazonaws.com
You can finds these details on the EC2 instance details page of your AWS account.
If you receive a response about file permission too free, you can change the file permission for your primarykey file (.pem file) using this commandchmod 400 primarykey.pemreplace primarykey with the name of your key file.
You will see the connection response of your EC2 instance, mine is Bitnami because my instance is a WordPress website instance, yours could be Ubuntu or Debian.
Other ways of connecting to your EC2 instance from a Windows machine
- OpenSSH Windows Powershell tool.
- PuTTY Windows tool for connecting through SSH.
- WSL, Windows Subsystem for Linux.
I have written a detailed description about this other methods on similar post Connecting to EC2 instance from a remote machine
Conclusion
To connect to and manage your cloud-based servers then you must connect to them remotely, SSH is the most popular secure way to do this. Windows doesn’t have it’s own SSH tool for doing this but you have been able to use Git SSH Unix tool for Windows to connect easily to your remote EC2 servers.
Push in your comments and ask questions if you had difficulties in doing this, let me hear from you. Also, check out similar post to this one below.
